
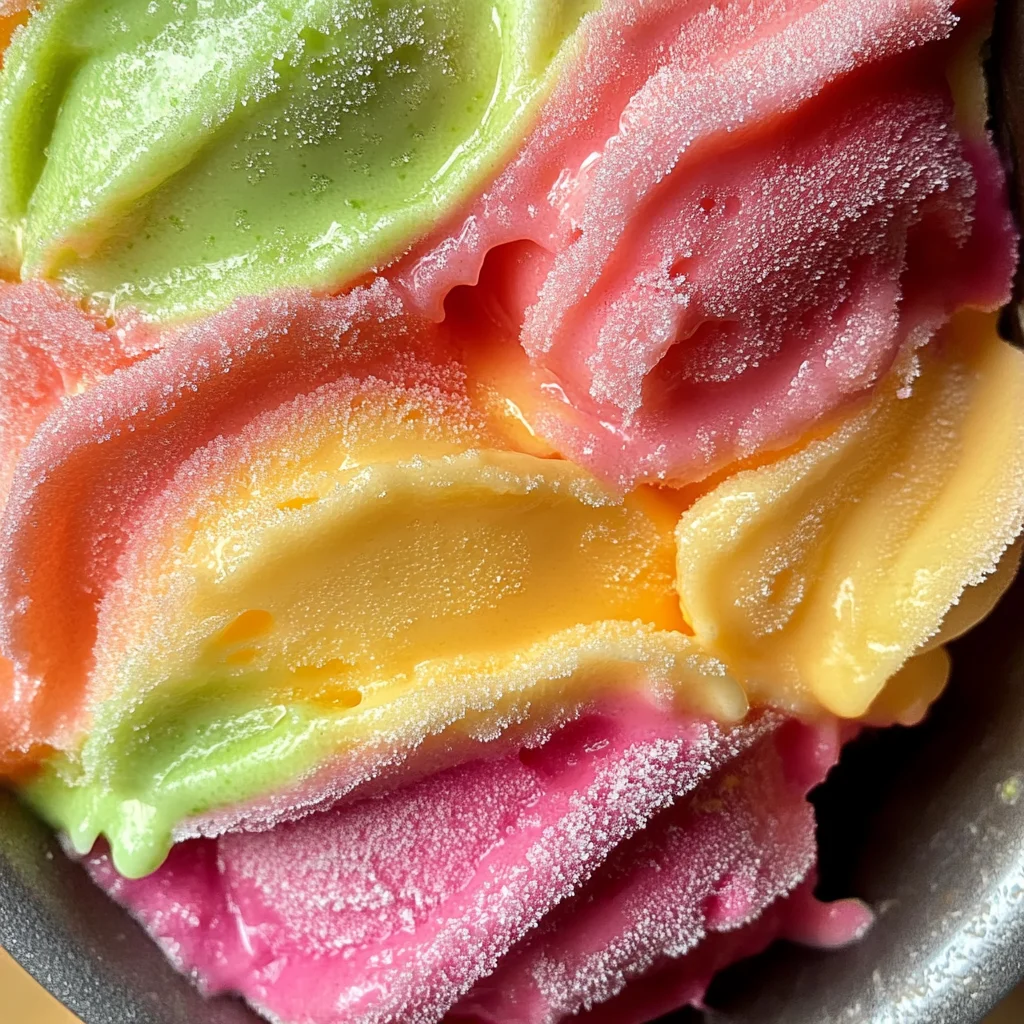
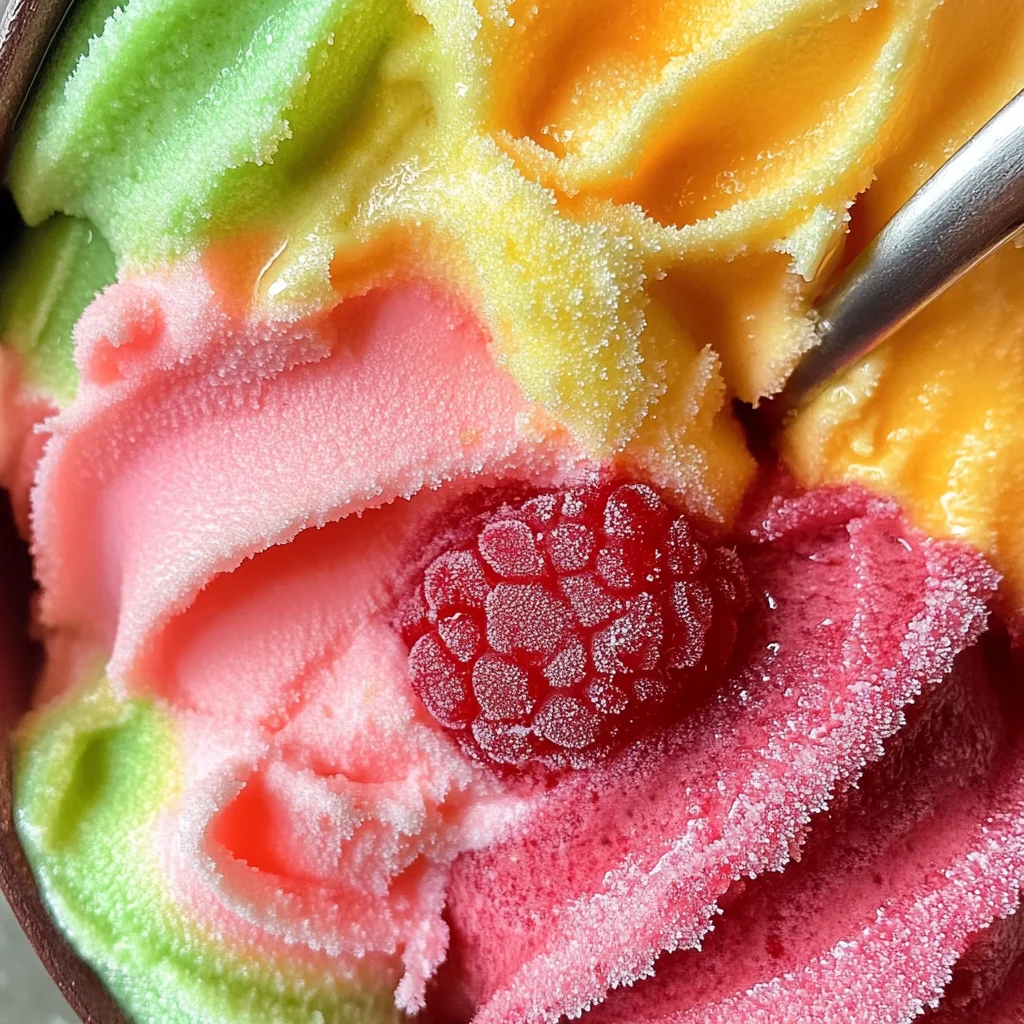
Indulge in the vibrant and refreshing delight of Homemade Rainbow Sherbet, a colorful frozen dessert that captures the essence of summer in every scoop. This delightful treat, made with fresh fruit juices and purees, is perfect for parties, barbecues, or simply a fun way to cool off on a warm day. With its creamy texture and customizable flavors, this homemade version outshines any store-bought option. Impress your guests and satisfy your sweet tooth with this easy-to-make sherbet that’s as pleasing to the eyes as it is to the palate!
Why You’ll Love This Recipe
- Refreshing Flavor: The combination of fruity flavors creates a refreshing taste that is perfect for hot days.
- Easy to Make: With simple ingredients and straightforward steps, making sherbet at home is a breeze.
- Customizable: Feel free to experiment with different fruit juices or add-ins like mint for unique variations.
- Visually Stunning: The vibrant colors make this dessert a showstopper at any gathering.
- Perfect for Any Occasion: Great for parties, family gatherings, or just as a treat during the summer months.
Tools and Preparation
Before you start making your Homemade Rainbow Sherbet, gather the necessary tools. Having everything ready will make the process smooth and enjoyable.
Essential Tools and Equipment
- Ice cream maker
- Saucepan
- Fine mesh sieve
- Blender
- Container for freezing
Importance of Each Tool
- Ice cream maker: Essential for achieving that creamy texture when churning the sherbet mix.
- Saucepan: Used to gently heat the cream and milk mixture, ensuring even sugar dissolution.
- Fine mesh sieve: Helps strain out raspberry seeds, resulting in a smooth puree for your sherbet.
Ingredients
For the Base Mixture
- 1 1/2 cups heavy cream
- 1 1/2 cups whole milk
- 1 3/4 cups granulated sugar (divided)
- 1 teaspoon alcohol-free vanilla extract
For the Flavors
- 3/4 cup orange juice
- 1/2 cup lime juice
- 8 ounces raspberries
How to Make Homemade Rainbow Sherbet
Step 1: Prepare the Cream Mixture
In a saucepan, combine heavy cream, whole milk, and 1 cup of sugar. Heat over medium heat until the sugar has dissolved completely. This should take about 5-7 minutes. Once dissolved, remove from heat and stir in alcohol-free vanilla extract. Allow this mixture to cool completely before proceeding.
Step 2: Prepare Raspberry Puree
Blend 8 ounces of raspberries with 2 tablespoons of sugar. After blending, strain the mixture through a fine mesh sieve to remove any seeds. Set aside.
Step 3: Churn the Base Mixture
Pour the cooled cream mixture into an ice cream maker. Churn according to manufacturer instructions until it reaches a soft serve consistency.
Step 4: Divide and Flavor the Mixture
Divide the churned base into two parts. Mix one part with 3/4 cup orange juice and add food coloring if desired. In another part, mix with 1/2 cup lime juice, adding green food coloring if desired.
Step 5: Layer and Freeze
In a suitable container, layer the flavored mixtures alternately between raspberry, lime, and orange. Freeze for 4-6 hours or until firm.
Enjoy your Homemade Rainbow Sherbet as a delightful dessert that’s sure to impress!
How to Serve Homemade Rainbow Sherbet
Homemade Rainbow Sherbet is not just a treat; it’s an experience! Serve this vibrant dessert in creative ways to elevate any occasion and impress your guests.
Scoop in Cones
- Serve each colorful layer of sherbet in waffle cones for a fun, portable dessert. The crunchy texture pairs wonderfully with the creamy sherbet.
Layered in Bowls
- Create a beautiful presentation by layering the different flavors in clear bowls. This allows everyone to see the vibrant colors before they dig in.
Garnished with Fresh Fruit
- Enhance the flavors by adding fresh fruit on top, such as sliced strawberries or mint leaves. They add a pop of color and a burst of freshness.
As a Float
- Mix scoops of rainbow sherbet with lemon-lime soda or ginger non-alcoholic beer. It’s a refreshing float that will delight both kids and adults alike.
With Whipped Cream
- Top your sherbet with a dollop of whipped cream for added richness. Feel free to sprinkle some colorful sprinkles for extra flair!
In Dessert Cups
- Use small dessert cups with spoons for a stylish serving option. These are perfect for parties or gatherings where guests can help themselves.
How to Perfect Homemade Rainbow Sherbet
Creating the perfect Homemade Rainbow Sherbet requires attention to detail and creativity. Follow these tips to ensure your sherbet stands out!
- Use fresh fruits: Opt for fresh fruit juices instead of bottled options for better flavor and nutrition.
- Chill your base: Make sure the cream and milk mixture is completely chilled before churning to achieve a smooth texture.
- Strain fruit purees: Straining raspberry puree removes seeds, ensuring a silky consistency that enhances the overall experience.
- Layer carefully: When layering flavors, pour slowly to avoid mixing colors and maintain distinct layers.
- Experiment with mixtures: Don’t hesitate to add unique combinations of fruits or herbs like mint for exciting flavor twists.
- Store properly: Keep sherbet tightly covered in an airtight container to prevent ice crystals from forming.
Best Side Dishes for Homemade Rainbow Sherbet
Pairing side dishes with your Homemade Rainbow Sherbet can create an unforgettable meal. Here are some delightful options:
- Fruit Salad: A mix of seasonal fruits adds freshness and balances the sweetness of the sherbet.
- Mini Cheesecakes: Individual cheesecakes provide a creamy contrast that complements the fruity flavors.
- Chocolate Chip Cookies: Classic cookies bring nostalgia and are always a crowd-pleaser alongside cold desserts.
- Pineapple Skewers: Grilled or fresh pineapple skewers offer a tropical twist that pairs beautifully with sherbet.
- Brownie Bites: Rich brownie bites create a decadent pairing with the lightness of rainbow sherbet.
- Savory Cheese Platter: A selection of cheeses can balance out the sweetness, making it an interesting combination.
- Granola Parfaits: Layer granola, yogurt, and berries for a wholesome option that still feels indulgent when served with sherbet.
- Coconut Macaroons: These chewy treats add texture and enhance tropical flavors when served alongside your rainbow delight.
Common Mistakes to Avoid
Creating delicious Homemade Rainbow Sherbet can be simple, but there are common pitfalls to avoid for the best outcome.
- Using expired ingredients: Always check the freshness of your cream and juices. Expired products can ruin the taste and texture.
- Skipping the cooling step: It’s crucial to cool the mixture completely before churning. Skipping this can lead to a grainy texture.
- Not straining fruit purees: Failing to strain your raspberry puree can result in undesirable seeds in your sherbet. Always strain for a smooth consistency.
- Over-churning the mixture: Churning for too long can make your sherbet icy instead of creamy. Stop when it reaches soft serve consistency.
- Layering incorrectly: To achieve beautiful layers, pour your mixtures carefully into the container. This prevents colors from blending too much.
Storage & Reheating Instructions
Refrigerator Storage
- Store Homemade Rainbow Sherbet in an airtight container.
- It can last in the refrigerator for up to 3 days, but it’s best enjoyed fresh.
Freezing Homemade Rainbow Sherbet
- Place it in a freezer-safe container with a tight lid.
- Homemade Rainbow Sherbet can be frozen for up to 2 weeks while retaining its flavor and texture.
Reheating Homemade Rainbow Sherbet
- Oven: Not recommended as it will melt unevenly.
- Microwave: Use low power settings and heat in short bursts if you need to soften it slightly before serving.
- Stovetop: This method is not suitable; it’s best served directly from the freezer.
Frequently Asked Questions
If you have questions about making Homemade Rainbow Sherbet, you’re not alone! Here are some common inquiries.
Can I use different fruits for Homemade Rainbow Sherbet?
Yes! You can experiment with various fruit juices and purees like pineapple or blueberry for unique flavors.
How do I make my Homemade Rainbow Sherbet creamier?
To achieve a creamier texture, ensure you’re using heavy cream and allow your mixture to cool completely before churning.
Can I make Homemade Rainbow Sherbet without an ice cream maker?
Absolutely! Pour the mixture into a shallow dish and freeze it. Stir every 30 minutes until desired consistency is reached.
What should I do if my sherbet becomes too hard?
If your Homemade Rainbow Sherbet is too hard after freezing, let it sit at room temperature for about 5-10 minutes before scooping.
How long does Homemade Rainbow Sherbet last?
When stored properly, it lasts up to 2 weeks in the freezer. For optimal flavor, try to consume it within that timeframe.
Final Thoughts
Homemade Rainbow Sherbet is not only visually stunning but also incredibly versatile. With endless possibilities for flavor combinations and add-ins, this treat is perfect for summer gatherings or a refreshing dessert anytime. Try making your version today!

Homemade Rainbow Sherbet
- Total Time: 30 minutes
- Yield: Approximately 8 servings 1x
Description
Indulge in the refreshing delight of Homemade Rainbow Sherbet, a colorful frozen treat that captures the essence of summer in every scoop. This vibrant dessert is crafted with fresh fruit juices and purees, making it a healthier and tastier alternative to store-bought options. Perfect for parties, barbecues, or a simple way to cool off on warm days, this creamy sherbet is easy to make and completely customizable. With its stunning colors and delicious fruity flavors, it’s sure to impress your guests while satisfying your sweet tooth!
Ingredients
- 1 ½ cups heavy cream
- 1 ½ cups whole milk
- 1 ¾ cups granulated sugar (divided)
- 1 teaspoon vanilla extract
- ¾ cup orange juice
- ½ cup lime juice
- 8 ounces raspberries
Instructions
- In a saucepan, combine heavy cream, whole milk, and 1 cup of sugar. Heat over medium heat until the sugar dissolves completely (5-7 minutes). Remove from heat and stir in vanilla extract. Let cool.
- Blend raspberries with 2 tablespoons of sugar, then strain through a fine mesh sieve to remove seeds.
- Pour the cooled cream mixture into an ice cream maker and churn until it reaches soft serve consistency.
- Divide the mixture into two parts; mix one part with orange juice and food coloring (if desired), and the other part with lime juice and green food coloring (if desired).
- Layer flavored mixtures alternately in a suitable container and freeze for 4-6 hours or until firm.
- Prep Time: 20 minutes
- Cook Time: 10 minutes
- Category: Dessert
- Method: Churning
- Cuisine: Frozen Dessert
Nutrition
- Serving Size: 1/2 cup (120g)
- Calories: 210
- Sugar: 35g
- Sodium: 60mg
- Fat: 10g
- Saturated Fat: 6g
- Unsaturated Fat: 3g
- Trans Fat: 0g
- Carbohydrates: 29g
- Fiber: 1g
- Protein: 2g
- Cholesterol: 40mg